 DOCS/BKPT STUDIO/PROMPT STUDIO
STUDIO 0.1 · GPUI EDITION
DOCS/BKPT STUDIO/PROMPT STUDIO
STUDIO 0.1 · GPUI EDITION
Prompt Studio
Design the prompt for the terminals Studio opens, visually: pick a preset, add and colour the segments you want, choose separators and powerline end caps, and watch the preview update as you go.
It applies to pwsh, Windows PowerShell, bash and zsh (cmd gets a plain version). Your own shell profile still loads first, and nothing in your home folder is changed.
Where it lives
Click the terminal icon at the bottom of the rail. The view has two halves: terminal settings on the left, the prompt designer on the right. The prompt you design here is used by every terminal pane Studio opens in the dock (Ctrl+`), for every project.
Preview and presets
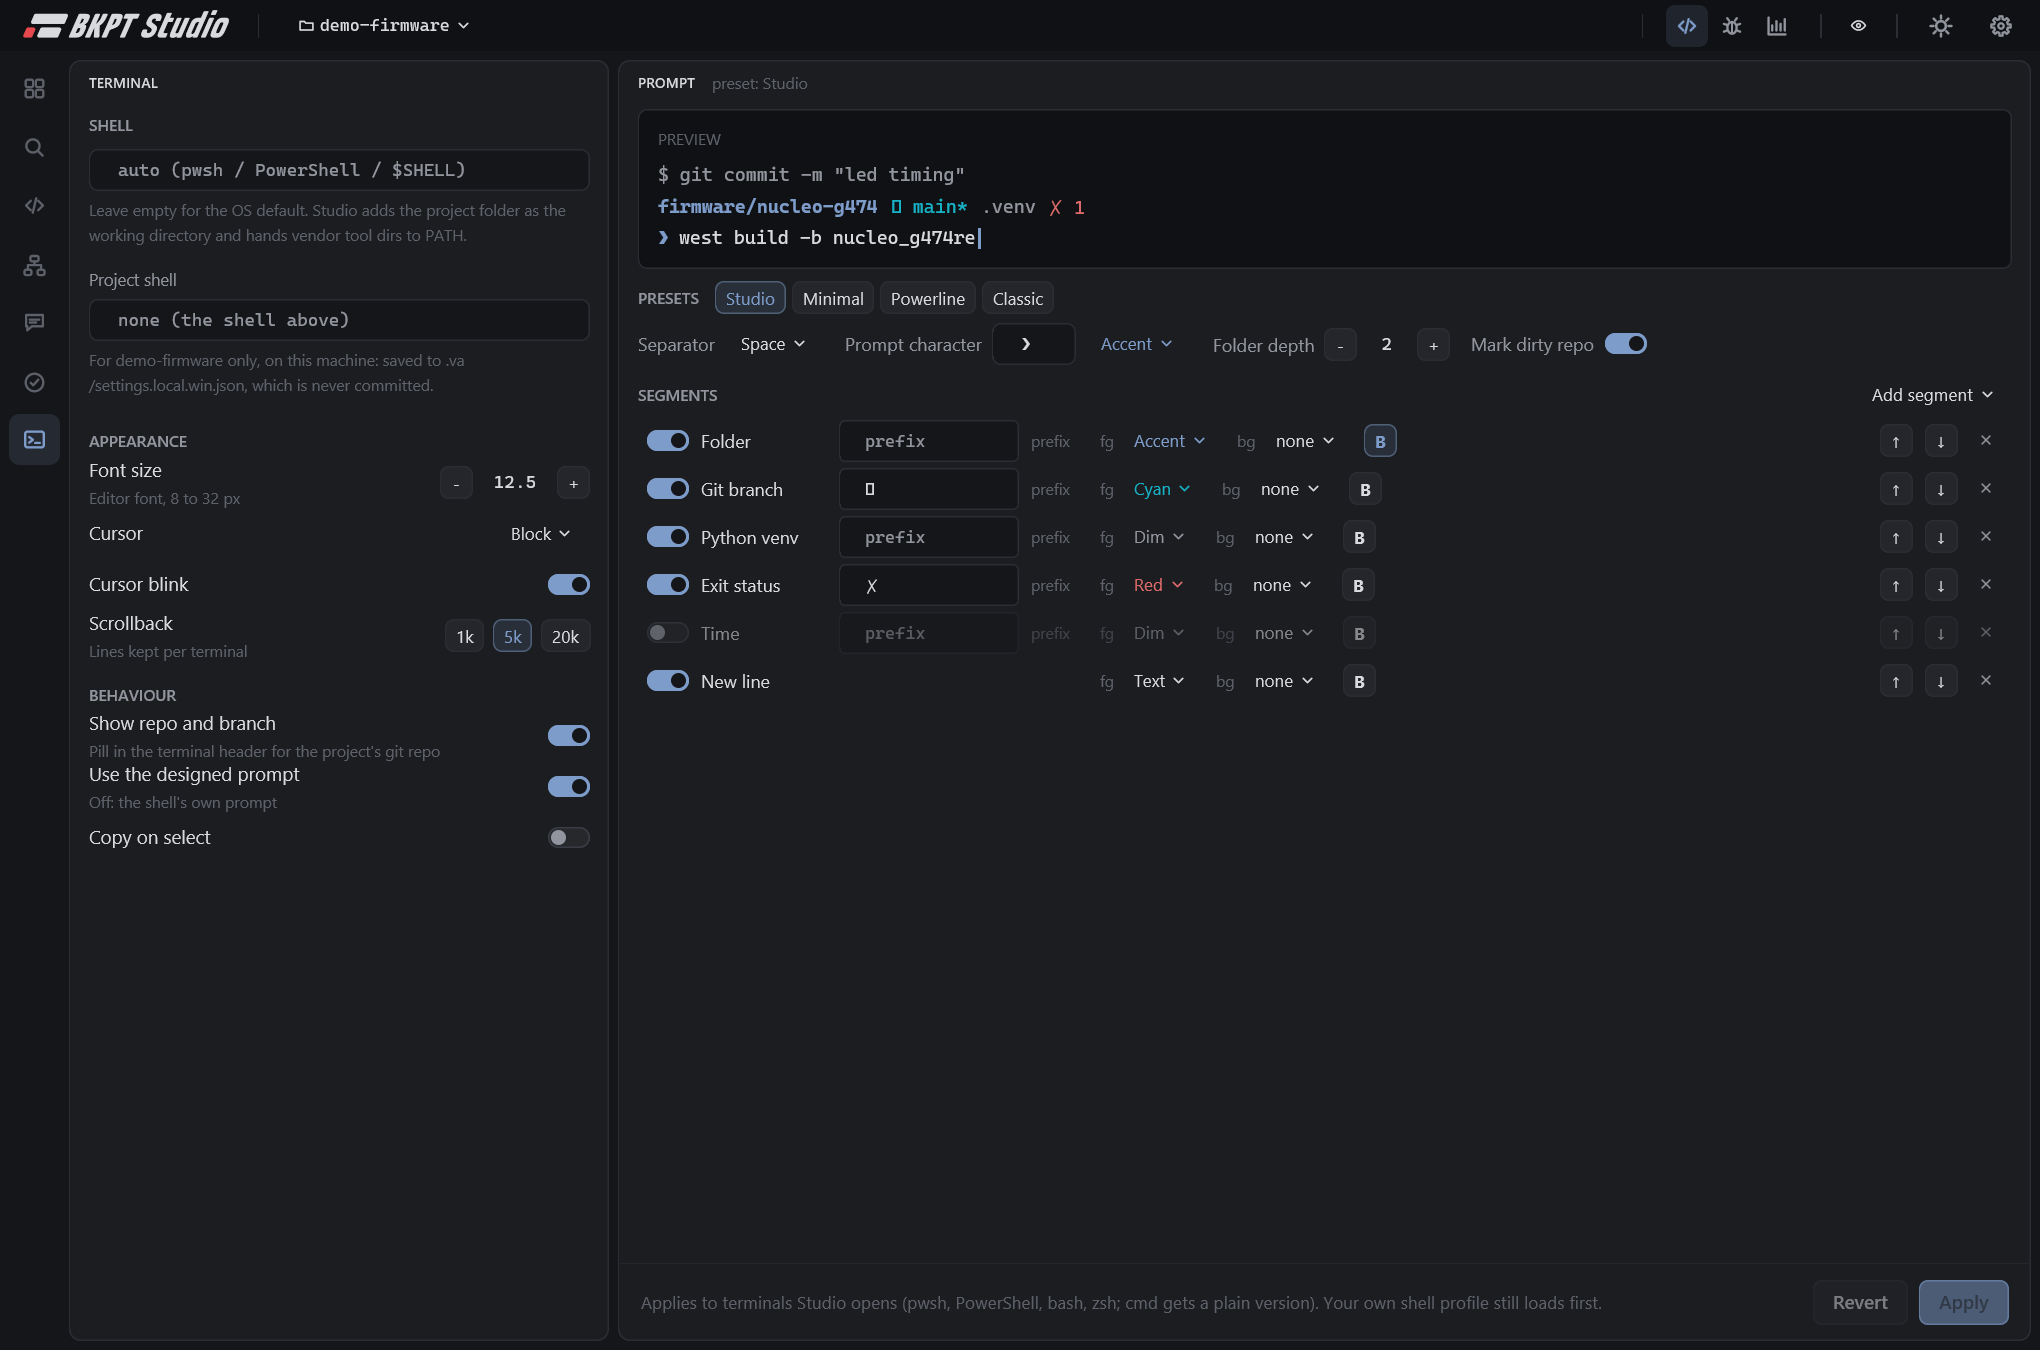
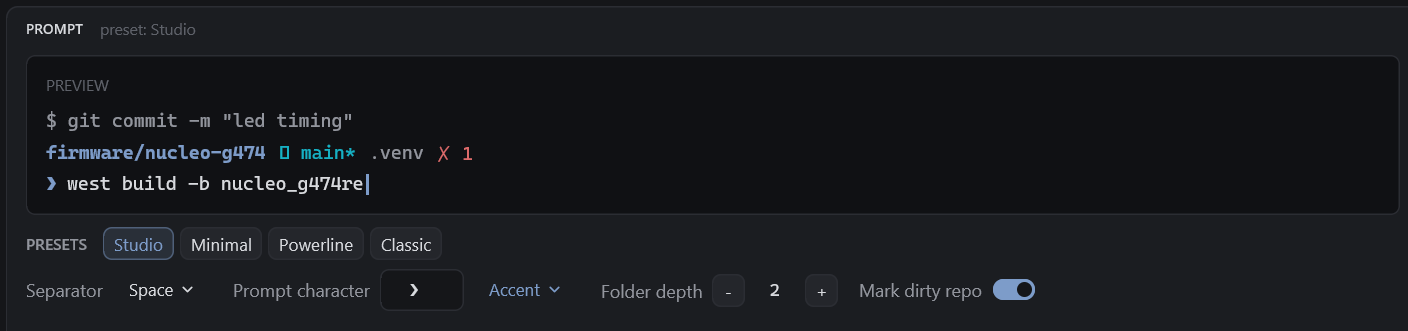
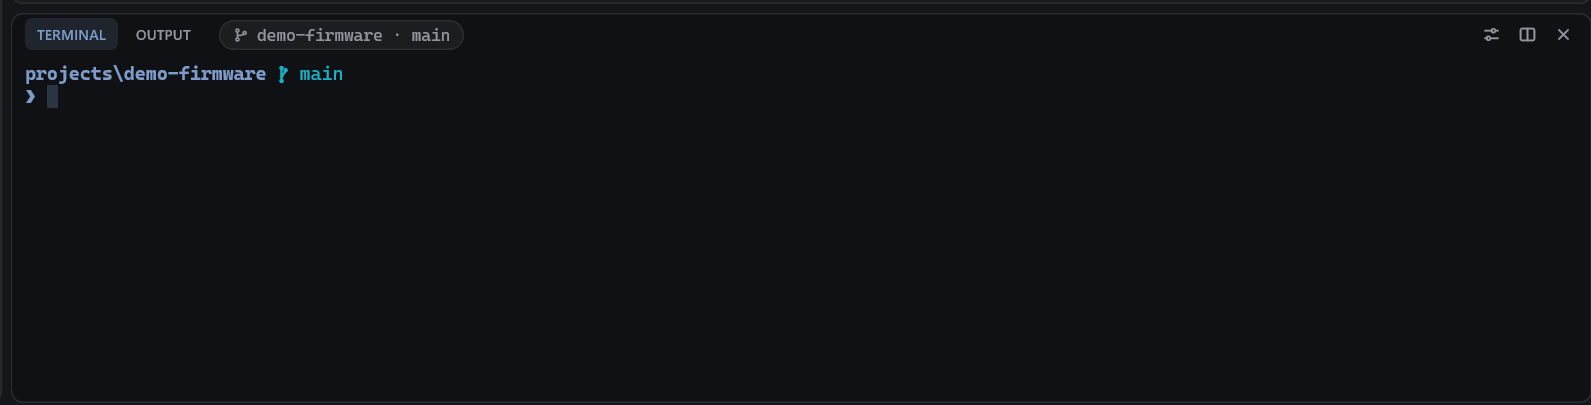
The preview at the top shows a sample command, the prompt as it will look, and the cursor line. Four presets are starting points; any edit after picking one turns the label into custom, so you always know when you are off the preset.
| PRESET | WHAT YOU GET |
|---|---|
| Studio | Two lines: folder, git branch, Python venv and exit status, then the prompt character on its own line. A Time segment is included but switched off. |
| Minimal | Folder and branch on one line, nothing else. |
| Powerline | Coloured blocks with powerline separators and an end cap; folder, branch and exit status. |
| Classic | The traditional user@host:folder (branch line with a $ prompt character and the full path. |


Three controls sit under the presets and apply to the whole prompt:
- Prompt character and its colour: the glyph on the last line where you type. Any text works, including an emoji.
- Folder depth: how many trailing path components the folder segment shows. Your home folder is shown as
~. - Mark dirty repo: adds a marker after the branch name when the working tree has uncommitted changes.
Segments
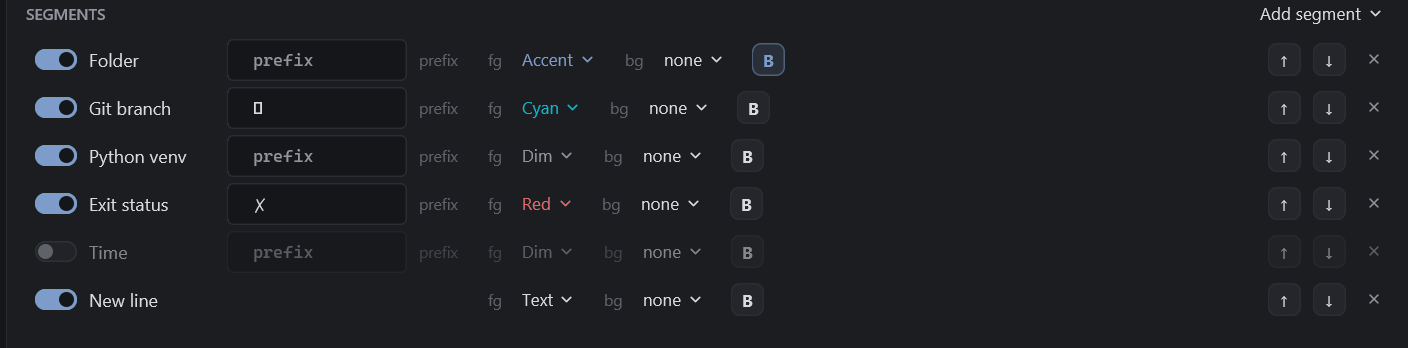
A prompt is a list of segments, rendered in order. Each row has an on/off switch, a prefix (text or a glyph shown before the value), a foreground and a background colour, a bold toggle, and buttons to move or remove it. Add segment at the right of the header offers every kind, including a second copy of one you already have.
| SEGMENT | SHOWS |
|---|---|
| Folder | The working directory, trimmed to the folder depth above. |
| Git branch | The current branch, or the short commit id when detached, with the dirty marker if enabled. |
| Exit status | The last command's exit code, only when it was not zero. |
| Time | The wall clock as HH:MM. |
| Python venv | The name of the active virtual environment. |
| User, Host | Your user name and the machine name. |
| Shell | Which shell is running: pwsh, powershell, bash, zsh or cmd. |
| Text | A literal you type into the prefix box: a label, an emoji, a separator of your own. |
| New line | A line break, for two-line prompts. |
Colours come in two flavours. The named ones (Accent, Text, Dim, Ok, Warn, Err, Info) follow the Studio theme, so a prompt designed in the dark theme still reads in the light one. The ANSI slots (0 to 15) are the terminal's own palette, which is what the Powerline preset uses for its solid blocks.
Separators and end caps
The separator sits between segments: Space, Chevron (›), Slash, or Powerline. Powerline turns each segment into a coloured block whose background flows into the next one, and adds an End cap choice for the trailing edge of the last block: Arrow, Round, Flame, Slant or Flat.
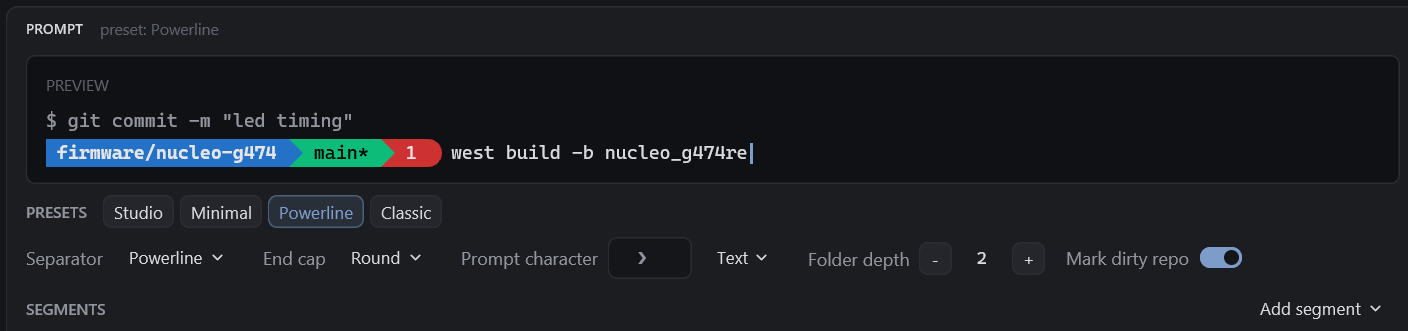
Studio's own terminal draws the powerline shapes itself, so they look right with any monospace font. If you copy the generated prompt into another terminal, that terminal needs a Nerd Font for the same glyphs.
Which shell runs
Leave Shell empty and Studio picks the OS default: pwsh if installed, else Windows PowerShell on Windows; your $SHELL on macOS and Linux, else zsh or bash. Enter a full path to run something else for every project.
Project shell overrides that for the open project only, on this machine only. It is saved in the project's .va/settings.local.<os>.json, which is never committed, so a teammate opening the same folder keeps their own choice.
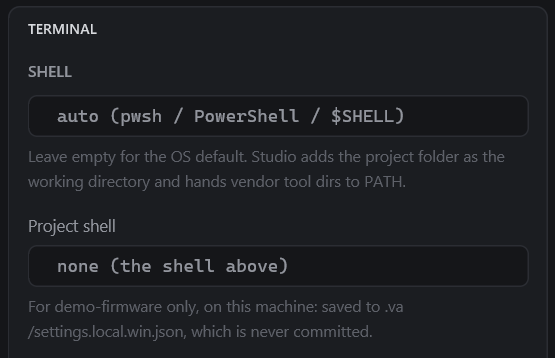
Either way Studio opens the shell in the project folder and puts the vendor tool directories it knows about on PATH, so build and flash commands work in the dock without any extra setup.
Appearance and behaviour
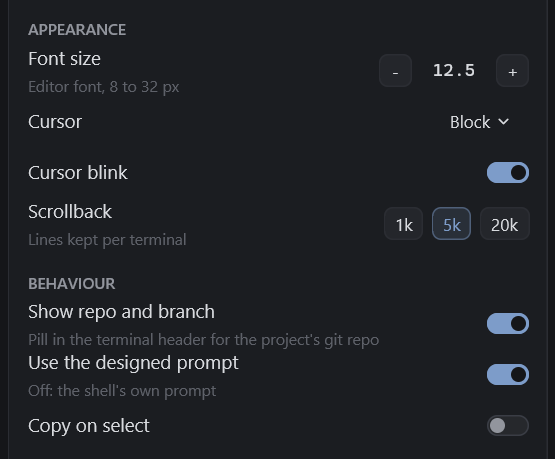
- Font size, 8 to 32 px, using the editor font.
- Cursor shape (block, bar, underline) and Cursor blink.
- Scrollback: 1k, 5k or 20k lines kept per terminal.
- Show repo and branch: the pill in the dock header with the project's git repo and branch.
- Use the designed prompt: turn it off and the shell shows its own prompt, exactly as it would outside Studio.
- Copy on select: selecting text in a terminal copies it, without Ctrl+C.
Apply and revert
Everything you change is a draft until you press Apply. The footer says so while there are unsaved changes. Apply saves the settings and restarts Studio's terminals with the new prompt; Revert throws the draft away and reloads what is applied.
Your profile still loads first
Studio never edits your shell profile. It writes small prompt files into its own settings folder and starts the shell so that your profile runs first and only the prompt is overridden afterwards:
| SHELL | HOW |
|---|---|
| pwsh, Windows PowerShell | Starts with a Studio script that loads your profile files inside a try/catch (a broken profile cannot take the prompt down), then sets the prompt function. |
| bash | Starts with --rcfile pointing at a Studio file that sources your ~/.bashrc, then sets PS1. |
| zsh | Starts with a Studio ZDOTDIR whose files chain to your ~/.zshenv and ~/.zshrc, then set the prompt. |
| cmd | A plain-text version of the prompt (colours and glyphs are not available there). |
Aliases, modules, PATH additions and PSReadLine settings from your own profile all survive.
Known limits
- Only terminals opened by Studio use the designed prompt. Your other terminals are untouched.
- A few glyphs (the branch icon in a prefix, for example) can show as a box in the designer until Studio ships its own icon font; in the terminal itself they render correctly.
- If a terminal fails to start, the Output tab says why; the usual fix is a wrong path in Shell. Clear it to go back to the OS default.